Museum Photography Tours: How to Take Great Photos Without Breaking the Rules
Ever walked into a museum, saw a breathtaking painting or an ancient artifact, and instantly reached for your camera-only to be stopped by a sign that says "No Photography"? You’re not alone. Many people visit museums hoping to capture something meaningful, not just as a souvenir, but as a way to remember the moment, share the beauty, or even practice their craft. But museums aren’t just galleries-they’re protected spaces with strict rules, fragile artifacts, and complex lighting. Knowing how to photograph in a museum isn’t just about pointing and shooting. It’s about understanding the balance between respect and creativity.
Why Museums Limit Photography
It’s easy to think museums ban photos because they’re trying to control how you experience art. But the real reasons are practical, not punitive. Many artworks use pigments and materials that degrade under light. Even the brief flash from a smartphone can cause long-term damage over time. Museums like the Metropolitan Museum of Art is a world-renowned art museum in New York City that houses over two million works spanning 5,000 years and the British Museum is a public museum dedicated to human history, art, and culture in London have strict policies because they’re responsible for preserving objects that can’t be replaced.
Flash photography creates sudden bursts of intense light. UV and infrared light from flashes accelerate fading in dyes, textiles, and paper. Even without flash, constant exposure from camera sensors and ambient light adds up. That’s why some museums allow photography in permanent collections but ban it in special exhibitions-those pieces are often on loan and come with their own conservation requirements.
Another reason? Crowds. Too many people with phones raised, tripping over each other, blocking views, or standing still for minutes to get the perfect shot ruins the experience for others. Museums want people to look, reflect, and connect-not just snap.
What’s Allowed? The Real Rules
Not all museums are the same. Rules vary by institution, wing, and even room. Here’s what you’ll typically find:
- Allowed: Still photography without flash, tripods, or selfie sticks in permanent collections.
- Restricted: No photography in temporary exhibitions, religious artifacts, or sensitive archaeological items.
- Banned: Tripods, monopods, lighting equipment, drones, or commercial filming.
- Permitted with permission: Using a tripod or professional gear-usually requires a formal request weeks in advance.
Look for signs near entrances, ticket counters, or on museum maps. Some places, like the Smithsonian Institution is a group of museums and research centers in Washington, D.C., funded by the U.S. government, allow unrestricted photography in nearly all galleries. Others, like the Vatican Museums are a series of art and historical museums located within Vatican City, ban all photography in the Sistine Chapel-even without flash-because of the delicate frescoes and copyright restrictions.
Pro tip: If you’re unsure, ask a guard. Most are happy to clarify. Don’t assume. A quick question saves you from being asked to delete photos-or worse, banned from the museum.
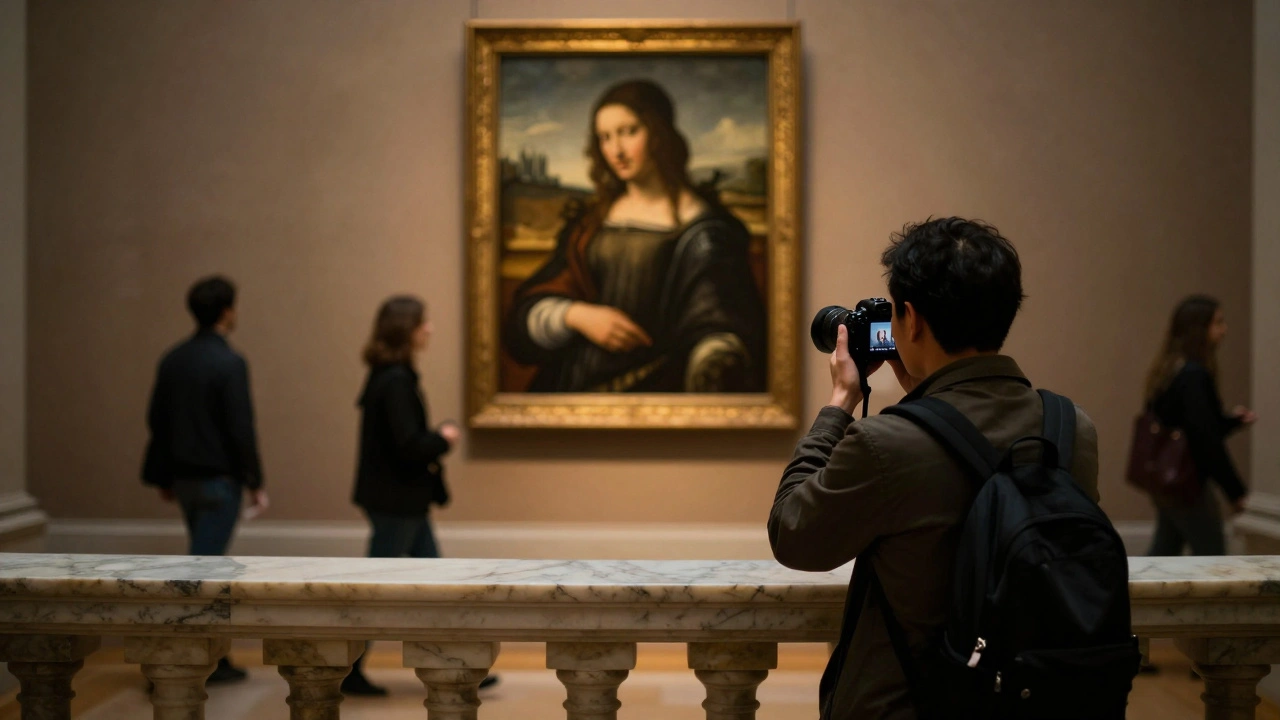
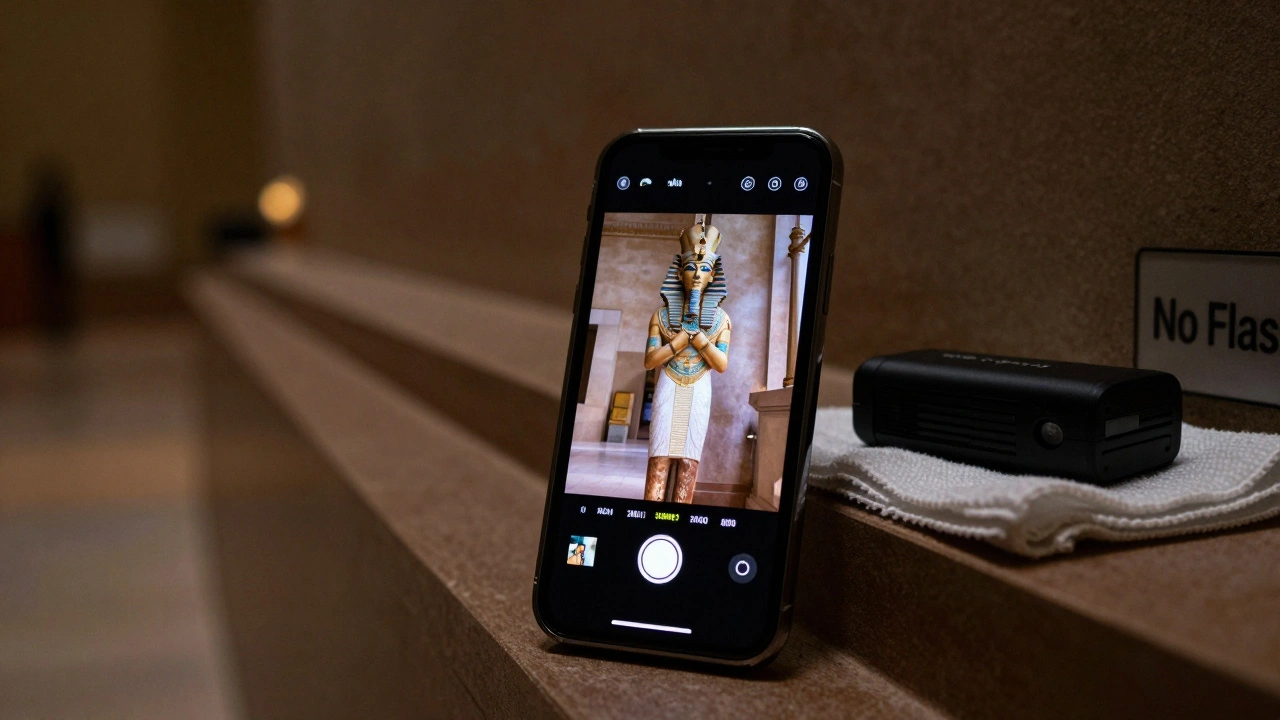
How to Shoot Without Flash
Shooting in low light without flash is tough, but it’s doable. You don’t need expensive gear. Here’s how to get sharp, clear shots with what you have:
- Open your aperture. Set your camera to f/2.8 or wider if possible. This lets in more light.
- Slow down your shutter speed. Go as slow as 1/30s or even 1/15s if you’re steady. Use a wall, railing, or your body as a support.
- Raise your ISO. Modern cameras handle ISO 1600-3200 well. Grain is better than blur.
- Use image stabilization. If your lens or camera has it, turn it on. It helps reduce shake.
- Don’t zoom in too far. Zoomed-in shots amplify camera shake. Get closer instead.
For smartphone users, switch to Pro or Manual mode. Tap to focus, then lock exposure by holding your finger on the screen. Wait for the museum lighting to settle-some rooms have timed lighting that dims or brightens every few minutes. Use that window.
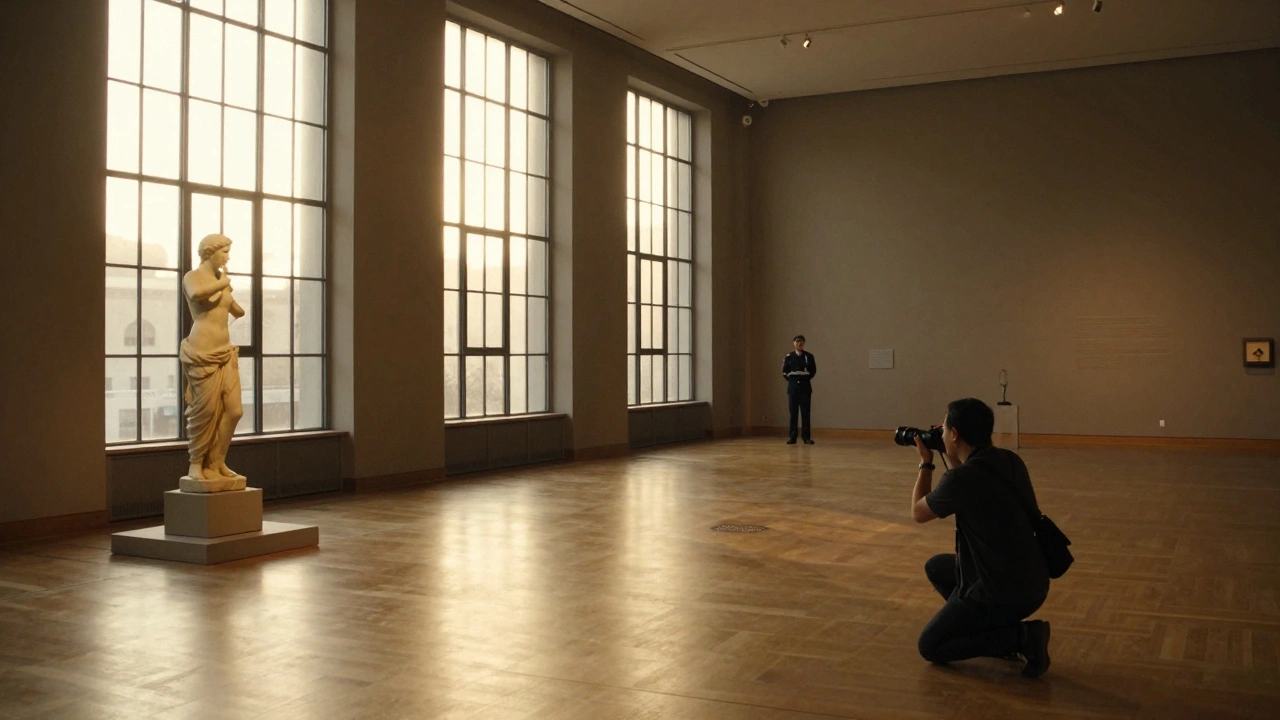
Best Times to Photograph in a Museum
Timing matters more than you think. The best photos aren’t taken at noon on a Saturday. They’re taken when the crowds are gone and the light is right.
- Opening hours: First hour after opening is quietest. Staff are still setting up. Fewer people means fewer reflections, fewer distractions.
- Weekday afternoons: After 2 p.m. on Tuesdays or Wednesdays, most school groups have left. Tour buses haven’t arrived yet.
- Extended hours: Many museums offer late-night openings once a week. These are ideal for photography. Less light pollution, fewer people, more space.
- Special events: Some museums host "photography nights" or "camera clubs"-check their calendar. These events often waive restrictions for attendees.
For example, the MoMA is a modern art museum in New York City known for its collection of 20th and 21st-century art offers free evening hours on Fridays. That’s when photographers flock in-not just for the art, but for the quiet.
What to Avoid
Even if you’re careful, there are common mistakes that ruin the experience-for you and others.
- Using a selfie stick or tripod. Even if you think it’s "small," it’s still a trip hazard. Most museums ban them outright.
- Blocking walkways. Don’t stand directly in front of a painting to take a photo. Move aside after one shot.
- Touching glass or frames. Oils from your skin can damage protective barriers over time.
- Posting photos without credit. Some artworks are copyrighted. If you’re sharing online, tag the museum. It’s respectful.
- Using your phone as a flashlight. If you need to read a label, use the museum’s provided lighting or ask staff. Don’t shine your screen.
One photographer in Chicago got banned from the Art Institute of Chicago is one of the oldest and largest art museums in the United States after using a tripod to shoot a Monet. He didn’t realize it was prohibited-even though the sign was right at the entrance. He lost access for a year.
Respect the Space, Not Just the Rules
Museums aren’t just buildings with art inside. They’re places of learning, preservation, and quiet contemplation. When you photograph, you’re not just capturing an image-you’re part of a shared experience. Your camera can help you see more deeply, but it shouldn’t distract from the art or others around you.
Think of it this way: if you were standing in front of a Van Gogh, would you rather have someone next to you taking 20 photos with a flash… or someone quietly studying the brushstrokes, then stepping back to let others have a moment?
Great museum photography isn’t about how many shots you take. It’s about how much you see. Sometimes, putting the camera down lets you notice more-the way light falls on a sculpture, the texture of a 500-year-old tapestry, the silence between visitors. Those moments stay with you longer than any photo.
Tools and Tips for Better Museum Photos
Here’s what works for serious museum photographers:
- Camera settings: Shoot in RAW. You’ll need the flexibility to fix exposure later.
- Post-processing: Use Lightroom or Snapseed to reduce noise and enhance contrast. Don’t over-edit-keep it natural.
- Bag essentials: A microfiber cloth (for lens smudges), a small flashlight (for reading labels), and a portable battery pack.
- Apps: Try PhotoPills or Exposure Calculator to estimate exposure settings in low light.
- Backup plan: If you can’t photograph, take notes. Sketch. Record audio. Memory isn’t just visual.
Some museums now offer digital guides with high-res images of artworks you can’t photograph. Use them. They’re often better than what you’ll get with your phone.
What to Do If You’re Asked to Stop
If a guard asks you to stop, don’t argue. Don’t delete photos. Just put your camera down, apologize, and thank them. Most guards are trained to be polite but firm. They’re not trying to ruin your day-they’re trying to protect something irreplaceable.
Some museums offer photography permits for serious artists or educators. If you’re a student, teacher, or professional photographer, ask about their media policy. Many have programs for educational use.
And if you’re really passionate? Volunteer. Many museums train docents and photo volunteers. You’ll get behind-the-scenes access, learn conservation techniques, and maybe even help curate the next exhibit.
Final Thought: The Best Shot Isn’t Always the One You Take
The most powerful museum photo you’ll ever take isn’t the one on your phone. It’s the one you remember: the way the light hit the gold leaf on a medieval altarpiece, the quiet hush before the crowd moved on, the realization that you were standing in the same room as a masterpiece that survived centuries.
Bring your camera. Use it wisely. But don’t let it become a barrier between you and the art. Sometimes, the best way to capture a moment is to simply be in it.